How to Pass California Smog Test Without the Stress
You're standing in line at the testing station with a registration deadline approaching, and the car feels perfectly normal. The check-engine light is off, the engine starts cleanly, and you're wondering whether a short drive to the station is enough. That's where many owners get caught. A California smog test can fail a vehicle that drives well if its emissions monitors haven't completed, especially after a battery replacement or diagnostic reset.
The practical way to pass California smog test requirements is to handle the job in the right order: confirm the vehicle needs testing, diagnose warning lights, verify readiness, complete a proper mixed-driving cycle, and inspect the simple hardware that causes avoidable failures. California's Bureau of Automotive Repair Smog Check guidance and its 2025 Smog Check Executive Summary Report make the point clear. Passing is less about luck at the bay and more about arriving with the emissions system ready to report.
Table of Contents
- Who Actually Needs a Smog Check and When
- Driveway Pre-Test Maintenance That Moves the Needle
- The Readiness Monitor Rule Most Drivers Miss
- Quick Visual and Mechanical Checks Before You Pay
- What Happens at a STAR-Certified Test-Only Station
- Failing the Test and the Free Retest Path Forward
- Final Pre-Test Checklist and Common Questions
Who Actually Needs a Smog Check and When
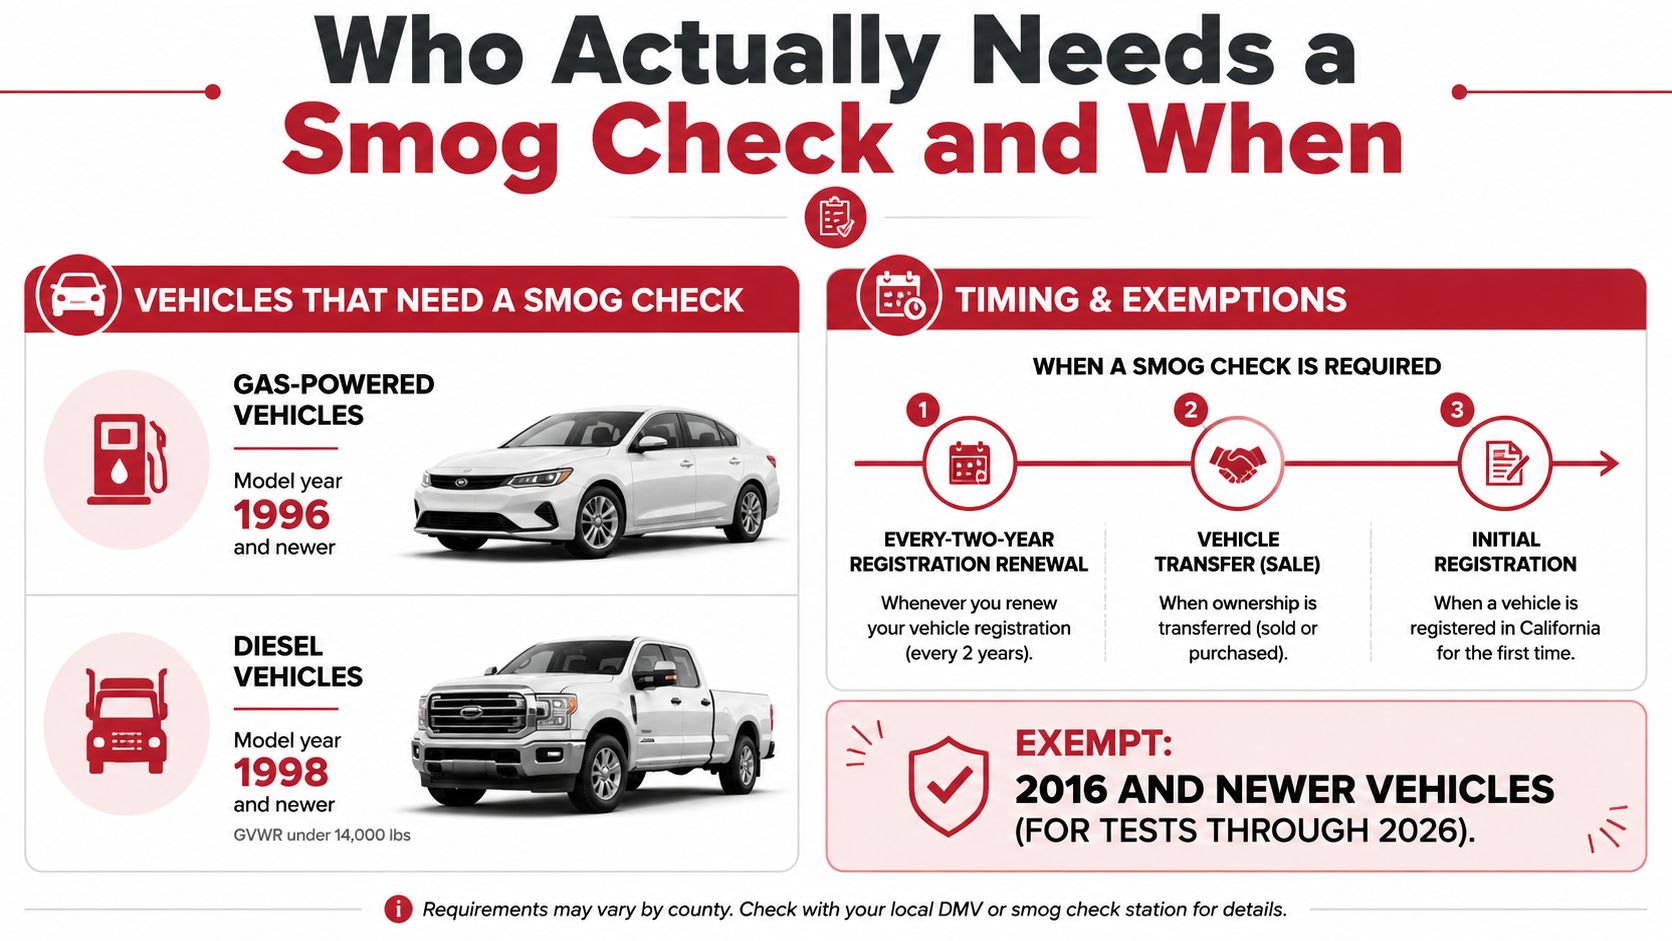
Start with eligibility. California generally requires checks for gasoline, hybrid, and alternative-fuel vehicles from model year 1976 onward. Diesel vehicles from model year 1998 onward are generally included, subject to the applicable weight and exemption rules described by the California Bureau of Automotive Repair.
The renewal exemptions are specific. Gasoline vehicles eight model years and newer generally don't need a renewal smog check, while gasoline vehicles four model years and newer generally qualify for the change-of-ownership exemption. Diesel vehicles from 1997 and older, or diesel vehicles exceeding 14,000 pounds GVWR, fall outside the stated testing requirement.
Check the trigger, not just the age
The BAR says Smog Check is required every other year as part of registration renewal. Your DMV renewal notice is the practical answer. If it says a smog check is required, plan for one. Some owners are also enrolled in the state's direct-mail renewal process, so the notice remains the document to follow rather than relying on a general age rule.
A change of ownership can trigger testing even when a vehicle would otherwise qualify for a renewal exemption. First-time California registration also matters. An out-of-state vehicle from 1976 or newer requires a Smog Check when it's first registered in California, which includes many used cars and light trucks entering the state.
For a broader explanation of California emissions testing requirements, use the vehicle's registration situation as your starting point.
Decision rule: If you received a DMV notice, test. If you bought the vehicle out of state, test. If it's a gasoline vehicle older than the applicable exemption window, expect a test. Otherwise, check the next registration or ownership milestone before assuming you're exempt.
Driveway Pre-Test Maintenance That Moves the Needle
The last few days before inspection are useful, but only if you spend them on legitimate preparation rather than gimmicks. No additive can repair a failed catalyst, oxygen sensor, or EVAP leak. Your best controllable advantage is arriving with the engine fully warm, the fuel system sealed, and the diagnostic computer undisturbed.
Use the drive as preparation
Take a 20-minute mixed drive that includes steady cruising, ordinary city operation, deceleration, and idle time. This warms the engine and catalytic converter and gives the computer the operating conditions it needs to run emissions self-tests. A short trip around the block isn't a drive cycle.
Check the fuel door and gas cap. Tighten the cap properly and replace it if the seal is visibly damaged. A new cap is a sensible repair for a damaged seal, but it won't solve a deeper EVAP leak.
Then inspect the basics:
- Air filter: Replace it if it's visibly dirty or restricted. Don't replace a clean filter because a test is approaching.
- Engine oil: Verify that the level is correct and that the oil matches the manufacturer's specified viscosity. An oil change is appropriate if maintenance is due.
- Fuel: Use fresh gasoline from a reputable, busy station. Don't experiment with unusual fuel blends immediately before inspection.
- Engine behavior: Notice hard starts, unstable idle, fuel odor, hesitation, or misfires. Those symptoms deserve diagnosis before testing.
Let the computer finish its work
After the mixed drive, allow the vehicle to cool and restart normally later. Don't disconnect the battery, clear trouble codes, or use a scan tool to erase a warning just to make the dashboard look clean. Those actions can reset readiness monitors and leave the car unprepared.
For more practical emissions-reduction maintenance, review this guide to reducing vehicle emissions.
A screwdriver and a few minutes of inspection are enough for most driveway checks. The goal isn't to manipulate the test. It's to catch loose components, obvious maintenance issues, and recent resets before you pay for an official result.
Before heading out, this video can help you visualize the basic preparation routine:
The Readiness Monitor Rule Most Drivers Miss
A vehicle can have no check-engine light and still fail because the onboard diagnostic system hasn't completed its self-tests. Readiness monitors are the computer's record that emissions-related systems have operated under the conditions required for evaluation. If the monitor status is incomplete, the inspector doesn't have a complete compliance picture.
BAR states that, effective October 1, 2025, all readiness monitors must be set for a vehicle to pass, except for unique design issues granted by BAR or CARB. That makes readiness a legal gate, not a suggestion. The BAR Smog Check FAQ explains the requirement and why a vehicle must complete its self-diagnostic testing.
The monitors you need to understand
| Monitor | What it checks | Typical setting conditions |
|---|---|---|
| Misfire | Combustion irregularities | Cold start, warm operation, and varied engine load |
| Fuel system | Fuel delivery and mixture control | Warm engine with changing load |
| Comprehensive components | Sensors, actuators, and related controls | Normal operation across different conditions |
| Catalyst | Catalytic-converter efficiency | Fully warm engine and steady driving |
| Heated catalyst | Heated catalyst operation, where equipped | Cold start and controlled warm-up |
| EVAP | Fuel-vapor containment | Fuel level and temperature conditions, followed by driving |
| Secondary air | Air-injection operation, where equipped | Cold-start operation |
| O2 sensor | Oxygen-sensor response and heater function | Warm engine with steady and changing conditions |
A battery disconnect, a recently cleared code, or a routine made up only of short trips can leave one or more monitors marked Not Ready. The engine may feel smooth because the vehicle is operating normally, but the computer still hasn't completed its required checks.
Set readiness before booking
The cleanest method is to use the manufacturer's drive-cycle instructions from the service manual. Follow the sequence precisely, because some monitors require a cold start, a stable cruise, a controlled deceleration, and an idle period.
A qualified shop can also diagnose why a monitor won't run and determine whether a permitted procedure applies. Use an OBD-II scanner to verify the monitor status before paying for the official inspection. Don't erase codes after checking. If the scan shows incomplete monitors, keep driving under varied conditions and rescan later.
The OBD readiness monitor guide can help you interpret what the scanner reports. Treat “Ready” as the finish line, not just the absence of a dashboard warning.
Quick Visual and Mechanical Checks Before You Pay
A few minutes beside the vehicle can reveal problems that cost little to correct but create an unnecessary failure. Start at the rear of the car and work forward. You're looking for loose, missing, altered, or visibly damaged emissions equipment.
The gas cap deserves special attention. Tighten it until it clicks and inspect the sealing ring for cracks, flattening, or damage. If the cap won't tighten securely, replace it before testing. A cap problem can also create an EVAP fault that turns on the malfunction indicator lamp.
Read the dashboard honestly
Turn the key on without starting the engine. The check-engine light should illuminate during the bulb check, then go out after the engine starts. If it stays on, diagnose the cause. If you recently cleared codes or disconnected the battery, don't confuse a dark dashboard with a ready vehicle. The reset may have erased the monitor history.
Check for signs that the vehicle needs attention:
- Rough idle or a misfire: Diagnose ignition, fuel, and air-control problems before inspection.
- Fuel smell: Look for a fuel or vapor leak rather than trying to mask the odor.
- Aftermarket intake parts: Return emissions-related modifications to a compliant configuration.
- Dangling hoses or missing components: Secure or repair them before the visual inspection.
- Fluid leaks: Identify the source and repair it, especially if the leak can affect engine operation.
Confirm that the VIN plate is legible and matches the registration paperwork. Inspect the catalytic converter and other visible emissions hardware for signs of tampering or removal. Don't rely on a clean-looking engine bay if the equipment isn't correct for the vehicle.
Tire condition and inflation should also be sensible for safe dynamometer operation. Correct mismatched or damaged tires and set pressure according to the vehicle manufacturer's specification. These checks won't cure an emissions defect, but they can prevent a simple inspection or safety concern from interrupting the appointment.
What Happens at a STAR-Certified Test-Only Station
A STAR-certified test-only station performs inspections under BAR requirements without selling the repair work needed after a failure. That separation matters. The technician's job is to inspect, record, and report the vehicle's result, not to create a repair sale.
Arrival starts with paperwork and vehicle identification. The technician then examines the visible emissions equipment, including the catalytic converter, air-injection parts where fitted, crankcase ventilation components, engine configuration, and gas-cap seal. After that visual check, the vehicle enters the emissions portion of the inspection.
The inspection sequence
Older applicable vehicles may undergo a loaded-mode test on a dynamometer. The equipment simulates driving while measuring pollutants such as hydrocarbons, carbon monoxide, and oxides of nitrogen. The exact test path depends on the vehicle's model year, fuel type, and inspection requirements.
Modern vehicles rely heavily on the OBD-II portion. The technician connects to the diagnostic port and checks for stored emissions-related trouble codes and completed readiness monitors. A car that feels normal can still fail here if the computer reports an active fault or incomplete self-tests.
The appointment usually includes more than inserting a scanner. Expect the technician to verify the vehicle identity, inspect components, operate the test equipment, and issue the result. Keep the Vehicle Inspection Report because it tells you exactly what passed or failed.
Choose the station based on the notice
A DMV-directed STAR requirement should be handled at a STAR station. The same applies to vehicles with a gross-polluter designation or owners who want a test-only inspection with no repair-sales conflict. Ask about retest terms before authorizing work, because the station and program conditions control whether a retest is free.
Don't arrive immediately after a battery reset, code clear, or repair that requires the computer to relearn. The station can report what the vehicle says, but it can't manufacture readiness.
Failing the Test and the Free Retest Path Forward
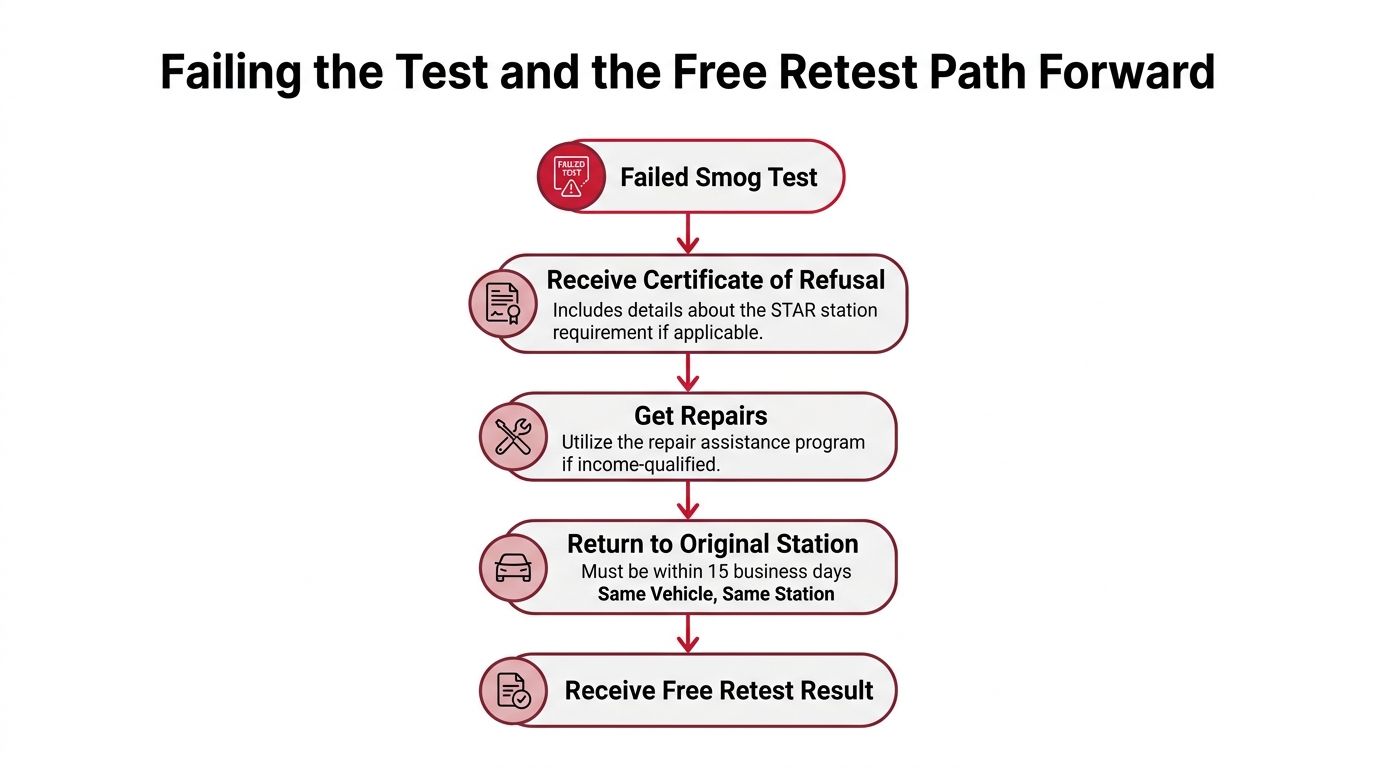
A failed certificate points to a specific problem, not the end of the vehicle's useful life. Get the complete Vehicle Inspection Report first, then identify the failed category. Do not approve random parts replacement because the result says “fail.”
Use the report to set repair priorities
Sort the result into three repair groups:
- Immediate low-complexity items: A damaged gas cap, disconnected hose, or obvious maintenance problem may be quick to correct.
- Diagnostic faults: Oxygen-sensor, EVAP, fuel-control, and misfire codes need testing before you install parts. A code identifies a system, not automatically a failed component.
- Emissions hardware failures: Confirm a suspected catalyst or other major component before authorizing replacement. An unresolved engine problem can damage the new part and leave you with another failure.
The BAR's 2025 executive summary recorded 11,275,981 initial tests and 959,667 failures, an 8.51% initial-test failure rate. Those figures appear in the official BAR report. The practical takeaway is clear: most vehicles pass initially, while the failed group still includes enough different causes to make a written repair plan worthwhile.
Protect your retest eligibility
Free-retest eligibility depends on the original testing location, the repair location, and whether the vehicle remains unaltered. Before leaving, ask the station to state its retest policy and the program conditions that apply to your vehicle.
After repairs or a computer reset, drive until the readiness monitors show complete. Returning to the bay too soon can produce another failure even after the underlying repair is finished. Bring the original report, repair invoices, registration materials, and any documents the station or DMV requests.
A gross-polluter designation may qualify you for California's Consumer Assistance Program if you meet its requirements. Check that option instead of guessing about repair funding. Keep every receipt and inspection document so the DMV has a clear record when registration depends on the repair and retest result.
Final Pre-Test Checklist and Common Questions
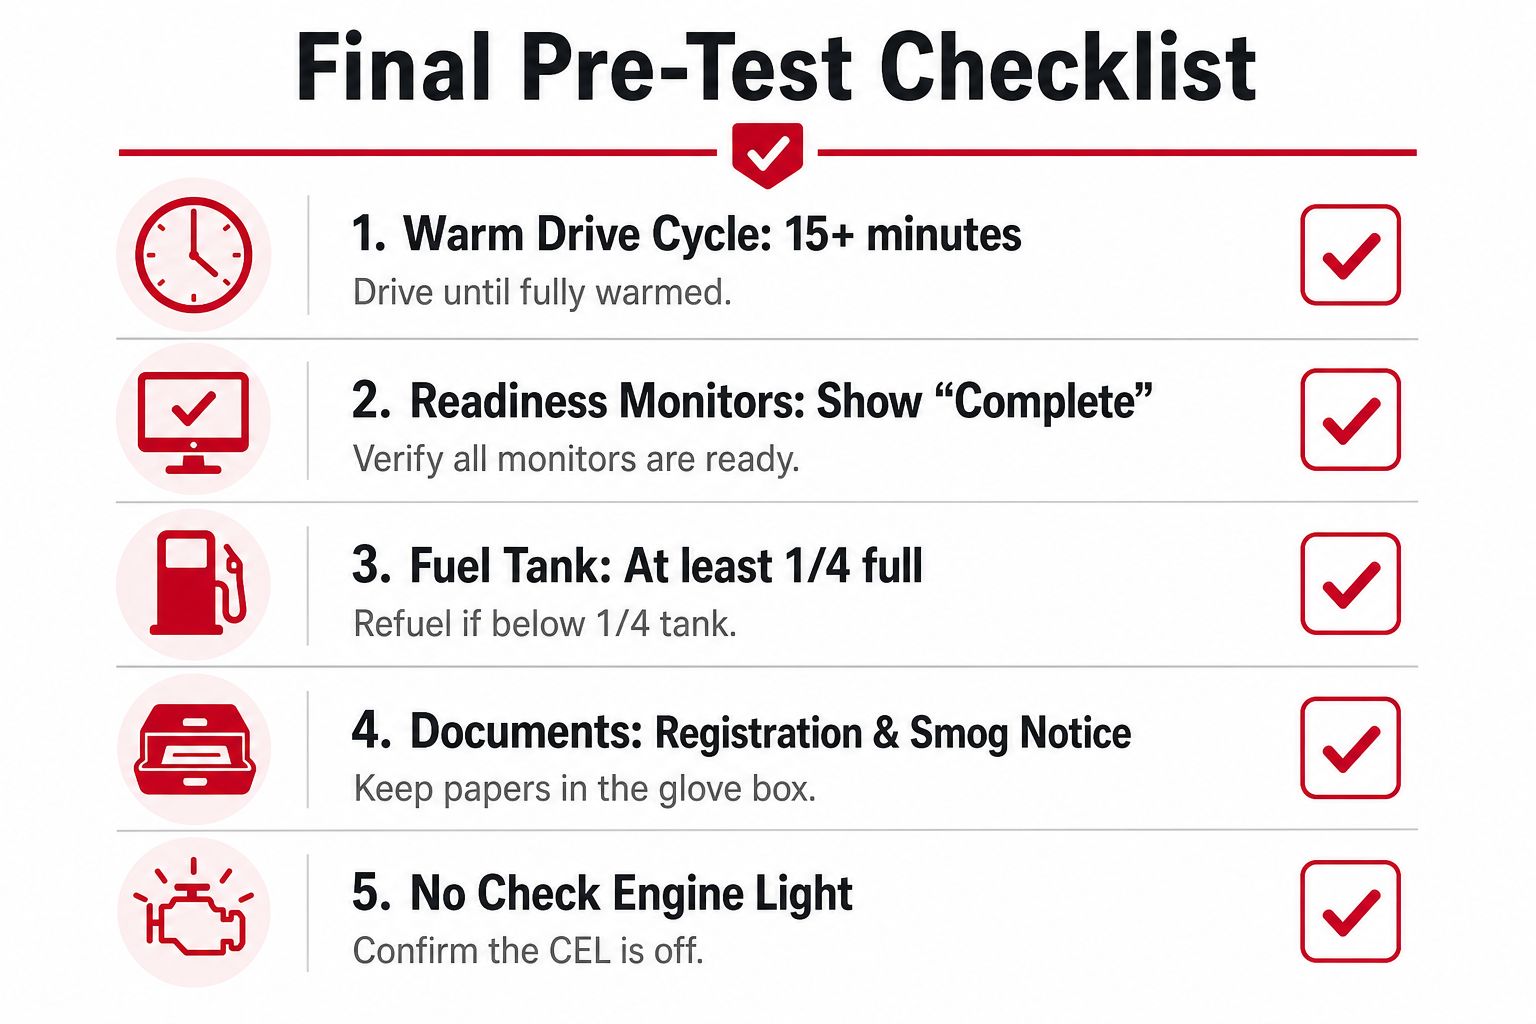
Use this list on the morning of the appointment. It's deliberately short because the useful checks are the ones you'll complete.
- Warm the vehicle: Drive through mixed conditions long enough to bring the engine fully to operating temperature.
- Verify readiness: Scan the OBD-II system and confirm every required monitor shows Ready.
- Check the fuel level: Keep enough fuel for normal operation and the test equipment.
- Secure the gas cap: Tighten it and confirm the seal looks intact.
- Watch the MIL: Don't test with the check-engine light illuminated.
- Bring documents: Carry the registration, renewal notice, and identification or insurance documents requested by the station.
- Inspect the VIN: Make sure the vehicle identification number is visible and matches your paperwork.
Common questions
Does a diesel vehicle always need a test? No. Diesel eligibility depends on model year and the stated weight exemption. Diesel vehicles from 1997 and older, or those over 14,000 pounds GVWR, are among the listed exemptions.
Does an out-of-state vehicle need California testing? Yes, an out-of-state vehicle from 1976 or newer generally needs a Smog Check for first-time California registration.
What if the check-engine light turns on while driving to the station? Stop treating the appointment as a pass attempt. Diagnose the fault first. An illuminated malfunction indicator lamp is a direct warning that the emissions system needs attention.
Do hybrids follow the same process? Hybrids are included in the general gasoline, hybrid, and alternative-fuel vehicle population, although their test procedure depends on the vehicle's design.
What happens after a battery disconnect? The disconnect can reset readiness monitors. Drive under the manufacturer's specified conditions and confirm the monitors are ready before testing.
For drivers who want the inspection handled by a STAR-certified test-only station, Fire House Smog offers smog inspections in Antioch, along with California DMV registration services and an applicable free-retest option under its stated policy and coupon terms. Bring your paperwork, verify readiness before arrival, and contact the station if your vehicle has unusual equipment or RV dimensions.